
Jasper Report is the one that is based on Jaspersoft Studio file. This software allows you to create comprehensive reports with calculations, charts, special fields and advanced formatting. Jaspersoft Studio has the free edition. To start using it, choose the latest version and download it from the official site.
Before you start importing a file to Memento Database, create it in Jaspersoft Studio. Follow the steps below:
- Launch Jaspersoft Studio.
- Create a new Jasper Report from File menu.
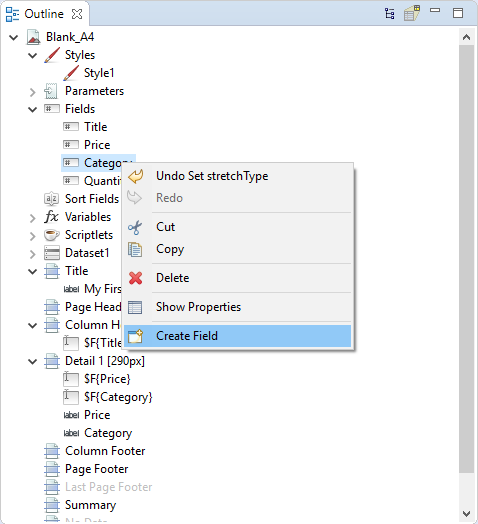
- On Outline tab, add Fields with the same names that you use in Memento Database. To add a new field, choose Create Field option from the Fields context menu:
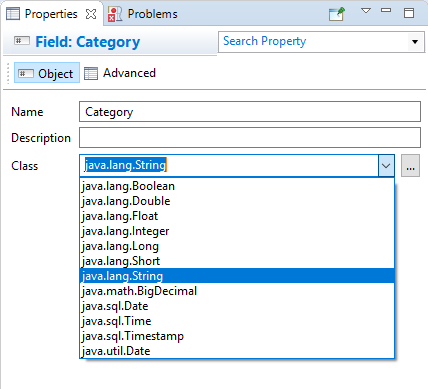
- On Properties tab, choose the relevant class (the field type) for each added field. To learn more about the correspondence between Memento Database field types and Jaspersoft Studio field class, visit wiki.
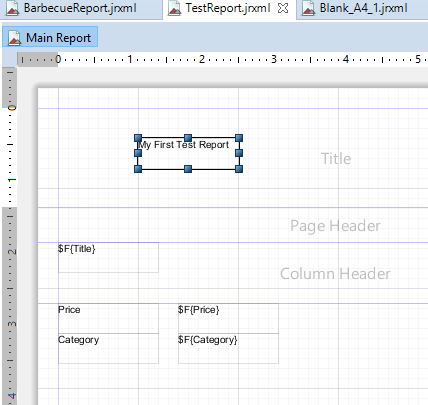
- Add fields to the Report body. Arrange the data as you want, add formatting or other special elements. Visit Jaspersoft official wiki to learn more about all the software possibilities.
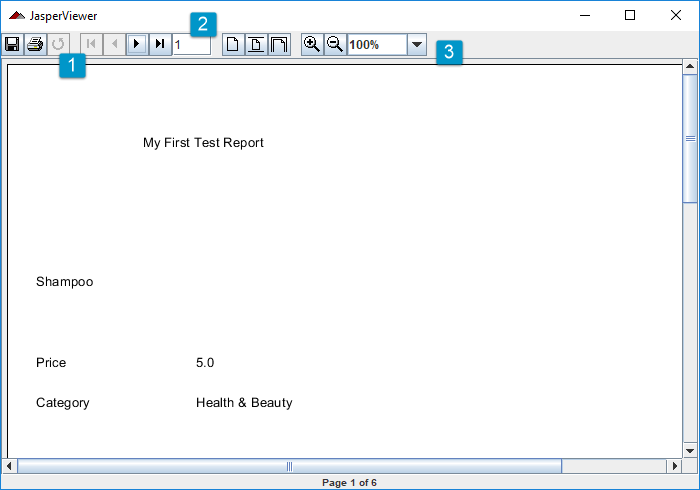
- Once your report is ready, save it and go back to Memento Database. In Memento Database, go to Report templates wizard, click icon and choose the Jasper Report option from the drop-down list. Then find the *.jrxml file to import it. Click Print button to preview.
Report is shown in the separate window with the toolbar that allows you to:
-
- Save the report as Jasper file, PDF, XLS or CSV table, etc., Print it or Reload in order to refresh the data
- Switch between pages if there are more than one was created for the report
- Adjust the scale to view the report in the most convenient way
Working with Image Fields
Memento sends images as a List because a single field can hold multiple images. To display images from Memento in your report, follow these steps in Jaspersoft Studio:
- Add the Field: Create a new field in the Outline tab. The name must exactly match the field name used in Memento.
- Set the Class: In the Properties tab, set the Field Class to java.util.ArrayList.
- Configure the Image Component: Add an Image element to your report and use the following expression in the Expression property:
$F{your_field_name}.get(index)- .get(0) — displays the first image.
- .get(1) — displays the second image, and so on.
- Prevent Errors (Null Check): If a record doesn’t have an image, the report may fail. To prevent this, select the Image component and enter the following in the Print When Expression field:
$F{your_field_name} != null && !$F{your_field_name}.isEmpty()
Displaying Linked Records
Available starting from version 4.0.
Memento Database allows you to include records from other libraries that are linked to the current record. For example, if you have an Invoice library and an Items library where each item has a link field pointing back to an invoice, you can display all related items directly in the invoice report as an embedded table.
To do this, Memento provides a special field in the datasource named linked_{Library Name}_{Field Name}, where {Library Name} is the name of the related library and {Field Name} is the name of the link field in that library that references the current record.
For example, if the Items library has a link field called “Invoice” pointing back to the current record, the special field name will be linked_Items_Invoice.
Follow these steps in Jaspersoft Studio to set up the embedded table:
1. Add the special field
In the Outline tab, right-click Fields → Add Field:
- Name: linked_Items_Invoice (replace with your actual library and field names)
- Class: net.sf.jasperreports.engine.JRDataSource
2. Add a Sub Dataset
In the Outline tab, right-click the report root → Add Dataset. Give it a name, for example itemsDataset.
Inside the dataset, add fields corresponding to the fields in the related library (e.g. Name, Qty, Price) with their appropriate classes.
3. Add a Table component
In the Palette panel, find Components → Table and drag it into the Detail band. In the wizard that opens:
- Select “Use a JRDataSource expression”
- Select your dataset: itemsDataset
- Enter the expression: $F{linked_Items_Invoice}
Add the columns you need and finish the wizard.
4. Adjust the band height
Since the number of linked records varies per entry, set the Detail band’s Split Type to Stretch so the band expands to fit all linked records without clipping.
Multiple linked libraries
If you need to display linked records from several different libraries in the same report, add a separate field, dataset, and table component for each one. For example, if an invoice also has linked payments from a Payments library with a link field called “Invoice”, add a second field named linked_Payments_Invoice and repeat the steps above for that library.