
Using Filters can help you fish out the needed entries from the most overcrowded library in a few clicks. To create a new Filter, follow these steps:
- Open the Local or Cloud library you want to manage
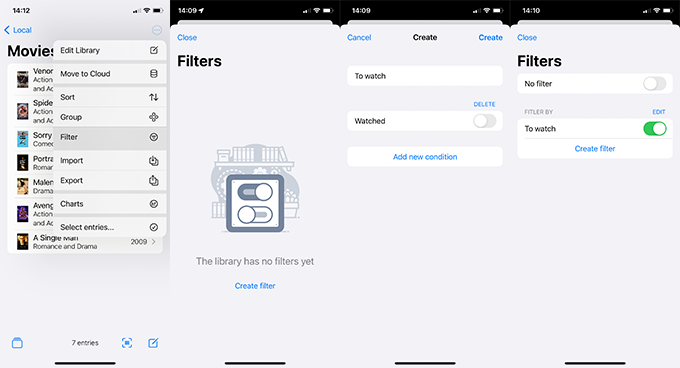
- Click on the three-dot menu on the upper-right side, and choose Filter
- Tap on Create filter to proceed
- Set the Filter name to define it, then pres Add new condition
- Now you will see the conditions you can use to filter the entries. Choose the one you prefer for this filter
- Choose how to process the condition: this setting will differ depending on the field type. For example:
- Multiple choice lists will have the following options: Is one of, Is not one of, Is equal to, Is not equal to, Is empty, Is not empty
- Text fields will have: Contains, Not contains, Is equal to, Is not equal to, Is empty, Is not empty. You will need to input the text you want to process with the previously set condition
- Boolean fields will have a toggle switch
- Integer fields will also have options like Less than, Greater than, and Between
- Once you have added the filter(s), you can manage and enable/disable them from the Filters menu. You will see the option No filter, enable it to turn off all the enabled filters. Tap one of the filters to arrange the entries according to the predefined condition.